Spring rose prep isn’t about doing “everything.” It’s about removing what blocks growth and setting the plant up for a clean restart. Clear winter debris, prune when buds swell, refresh the soil with compost, begin feeding when new growth appears, and water at the base to keep leaves dry. Finish with a fresh 2–3 inch mulch layer (kept away from the crown) so moisture stays steady and roots wake up evenly. When roses start spring clean and growing steadily, they bloom more and struggle less.
Is your garden ready for the new season? Spring is vital to preparing your rose garden for a season of gorgeous blooms. Before the new season begins, let’s go through the basics together. Let’s dive in.
1. Clean Up Your Rose Garden
Start by tidying the garden after winter.
- Remove Debris: Clear away fallen leaves, mulch, and dead branches around your roses. This prevents pests and diseases from overwintering.
- Weed Thoroughly: Pull weeds by the roots to prevent competition for nutrients.
- Sanitize Tools: Clean your pruning shears and gardening tools with rubbing alcohol to avoid spreading diseases.
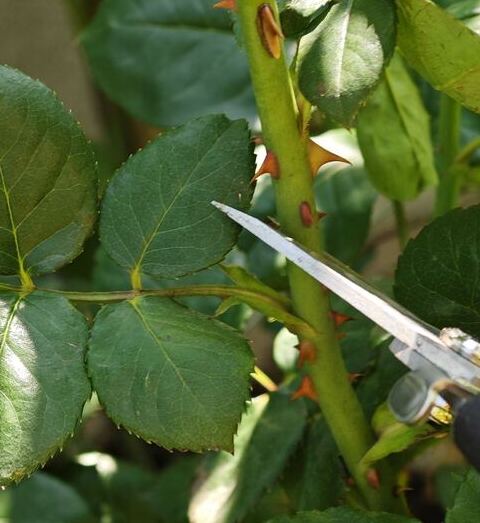
2. Prune Your Roses Properly
Pruning encourages healthy growth and beautiful blooms.
- Timing: Prune roses just as buds swell before new growth starts. This is typically in late winter or early spring, depending on your climate.
- How to Prune:
- Cut back dead and damaged canes to healthy wood.
- Remove canes that cross or rub against each other.
- Prune to an outward-facing bud to promote outward growth and better air circulation.
- Tip: Use sharp, clean tools to make smooth cuts. Apply a sealing compound to larger cuts to protect against disease
A detailed guide to pruning different types of roses can be found here.
3. Check and Amend the Soil
Roses love nutrient-rich, well-draining soil.
- Test Soil pH: Use a soil test kit to check the pH. Roses prefer a pH of 6.0–6.5.
Add Amendments:
- Compost or Manure: Mix well-rotted compost or aged manure into the soil around the base of each plant.
- Bone Meal: Sprinkle bone meal for added phosphorus, which helps root and bloom development.
- Organic Mulch: Lay 2–3 inches of mulch to retain moisture and regulate soil temperature.
4. Fertilize your rose garden
Boost your roses’ energy with proper feeding.
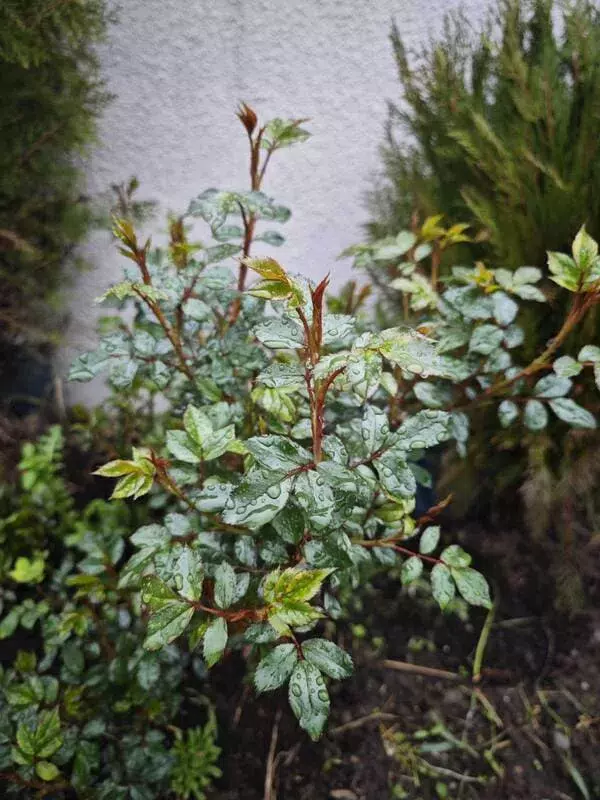
- When to Fertilize: Start feeding as soon as new growth appears.
- What to Use: Choose a balanced fertilizer (e.g., 10-10-10) or one specifically formulated for roses.
- Application: Follow the package instructions and water thoroughly after applying to avoid root burn.
5. Inspect for Pests and Diseases
Prevention is better than cure!
- Common Pests: Look for aphids, spider mites, and scale. Use insecticidal soap or neem oil as needed.
- Fungal Diseases: Black spots and powdery mildew are common issues. Apply a fungicide at the first sign of trouble.
- Encourage natural predators like ladybugs by planting companion plants such as lavender or marigolds.
6. Water Strategically
Roses thrive with proper hydration.
- Frequency: Water deeply 1–2 times per week, depending on rainfall and soil drainage.
- Best Practice: Water at the base to avoid wetting the foliage, which can lead to fungal issues.
- Tip: Install a drip irrigation system for consistent and efficient watering.
7. Plan for Growth
Support healthy and abundant blooms.
- Staking: Add stakes or trellises to support climbing roses or top-heavy blooms.
- Spacing: Ensure good airflow by maintaining proper spacing between plants.
- Companion Plants: Plant roses with garlic or chives to deter pests or with lavender to attract pollinators.
8. Final Touch: Spring Mulch
Mulch serves as a protective blanket for your roses.
- What to Use: Organic options like bark chips, straw, or shredded leaves work best.
- How to Apply: Keep mulch about 2 inches from the base of the plant to prevent rot.
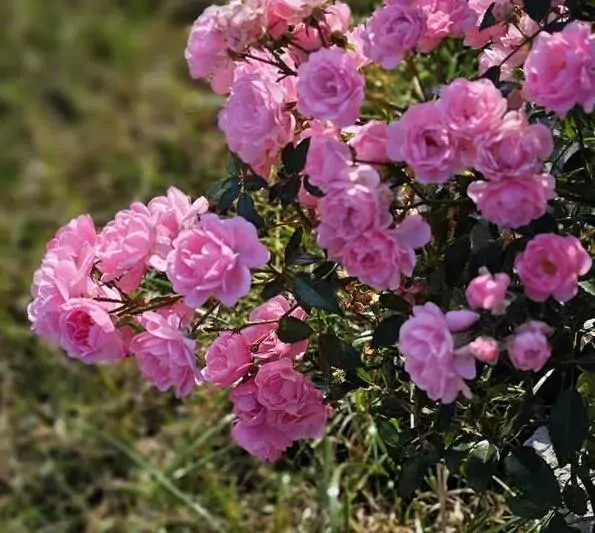
the Fairy rose
Preparing your rose garden for spring is rewarding, ensuring a vibrant, bloom-filled season. By cleaning, pruning, feeding, and maintaining your roses, you’re setting the stage for success. Don’t forget to admire your work and share the beauty of your flowers all spring long!
If spring work keeps turning into emergency work by June, the problem usually isn’t effort – it’s missing the one reason your rose stalls. That’s where most gardeners get stuck: pruning and feeding, but never fixing the real reminder the plant is giving you. Why Doesn’t My Rose Grow and Bloom? – 100 Reasons and Solutions helps you diagnose what’s actually happening (and what to stop doing) so your spring prep leads to real, repeatable bloom.
If you want your spring routine to get easier every year, you need records. The win is not “more tips”, it’s repeating what worked and cutting what didn’t. The Rose Garden Planner 2026 – Log Book provides a clean space to track pruning timing, feeding dates, weather shifts, and bloom cycles.
And if you’re done reacting to pests and disease all season, start where the results actually begin: the soil system. Revolution in the Rose Garden – Organic Rose Gardening lays out the soil-first approach that keeps roses growing steadily so problems don’t snowball.
Rose gardening books

Step into a calmer, more confident rose season. With Ann Devis’s rose gardening books and planner, you’ll get simple organic routines, proven tips, and checklists that keep your roses thriving – from first bud to last bloom.

FAQs about rose garden
Prune your roses when the threat of frost has passed and buds begin to swell. This timing ensures the plant is ready to grow without risk of damage.
A fertilizer balanced in nitrogen, phosphorus, and potassium (like a 10-10-10 mix) works well. For best results, look for formulas labeled for roses.
Yes, roses can thrive in containers if the pot is large enough and has proper drainage. Use high-quality potting soil and ensure the roses get ample sunlight.
Roses thrive with 6–8 hours of direct sunlight daily. Morning sun is especially beneficial as it dries down and reduces disease risk.
It’s a good idea to refresh mulch in spring. Remove old mulch that harbors pests or has compacted over time and replace it with a fresh layer.