Most gardeners start spring by buying care products. Let’s pause here for a moment. Consider whether all the products worked last year. Were your roses sick? How did they bloom?
If your roses didn’t grow well last year, the problem wasn’t a lack of chemicals, but a lack of a system.
If your roses didn’t grow well last year, the problem wasn’t a lack of chemicals, but a lack of a system.
Preparing for spring sets the tone for the entire season. If you prevent pests before they appear, strengthen the soil microflora before growth begins, and protect the leaves before the disease threat mounts, your roses won’t need help later. Here’s what I suggest.
This is my complete organic spring protocol. I use it every year. It works because it creates a system, not a reaction. We eliminate the source of the problem, not treat the symptoms. That’s the beauty of an organic approach.
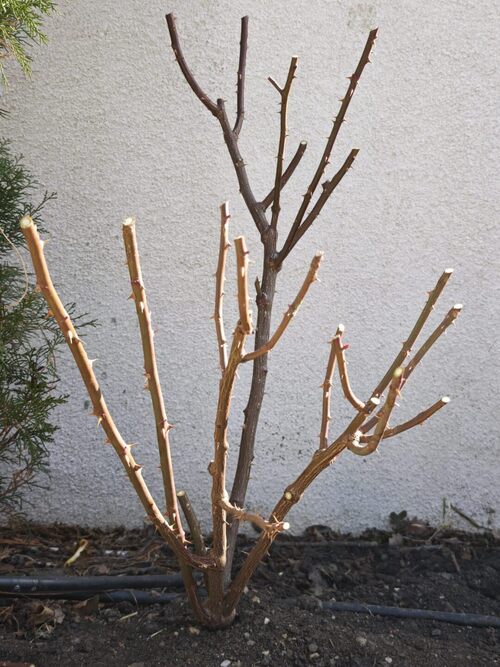
Step 1. Pruning Comes First
Pruning isn’t decoration. It’s a structural correction.
Leaving weak, damaged, or crossing shoots will waste the plant’s energy and create a damp environment inside – an ideal breeding ground for disease.
I’ve written about pruning in detail in other articles (you can find it here – https://rosehomegarden.com/rose-pruning/), but here’s the basic principle:
Remove all dead, weak, inward-growing, or damaged shoots. Opening the center is the most important step. A crowded center creates ideal conditions for pests and fungal diseases. Let’s not create a comfortable environment for pests. Preserve strong, outward-facing shoots.
Without proper pruning, no other spring preparation will work properly.
Step 2. Clean the Garden Completely
Most gardeners skip this step. This is why pests return.
Old leaves under roses are not harmless. They serve as winter refuges for fungal spores and insect larvae, which are often pests.
Remove:
- All fallen leaves – especially from roses. I often mulch roses with tree leaves for winter, but tree leaves don’t spread disease to roses; trees and roses have different diseases. Therefore, it’s important to remove rose leaves. I understand this can be tedious, but it’s very important.
- Any damaged or blackened stems
- Dry debris around the base
Don’t compost infected material. Remove it from the garden.
Spring begins with clean soil. Not just neat, but biologically clean.
Step 3. Treat the Soil with Metarhizium
At this stage, most people do nothing, and that’s why the larvae survive.
Metarhizium is a beneficial soil fungus. It infects and kills insect larvae overwintering in the soil before they develop into adults. It is effective against pests such as:
- Rose sawfly larvae
- Beetle larvae
- Other soil insects
Apply it when soil temperatures are consistently above 8–10°C (46–50°F). Cool soil means inactive biological activity. But it’s not hot enough for the larvae to emerge. It’s important not to skip this stage.
The goal is simple: kill pests in the larval stage before they reach your leaves.
If you wait until you see damage, you’ll be too late.
Step 4. Add Compost or Manure
After treating with Metarhizium, I add mature compost or manure directly to the soil surface.
This is long-term nutrition, not a quick fix.
Compost feeds soil organisms. Soil organisms feed roses.
Without organic matter, the soil becomes a sterile growing medium. Roses may survive, but they won’t thrive.
Apply a generous layer around the base, avoiding direct contact with the stems. I add about a bucket per bush once a season.
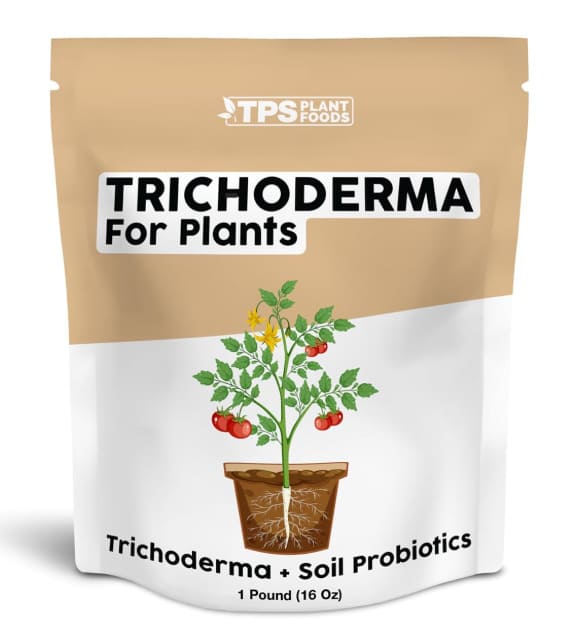
Step 5. Introduce Trichoderma
A week after adding compost, I treat the soil with Trichoderma. The word sounds really scary, doesn’t it? However, it’s the oldest enemy of pathogenic fungi on the planet and is always present in nature.
Trichoderma is another beneficial fungus, but it works against pathogenic fungi that harm plants. You can buy a ready-made garden concentrate to avoid foraging for it in the wild.
Trichoderma:
- destroys pathogenic fungi
- Colonizes the root zone
- Strengthens plant immunity
For proper activation, apply when soil temperatures are above 10-12°C (50-54°F).
This step introduces the natural enemy of black spot and other fungal diseases – before they even start. I treat stems, leaves, and soil with Trichoderma approximately 3-5 times per season. It is better to spray with Trichoderma after a good rain, on damp soil.
Prevention is always better than a cure.
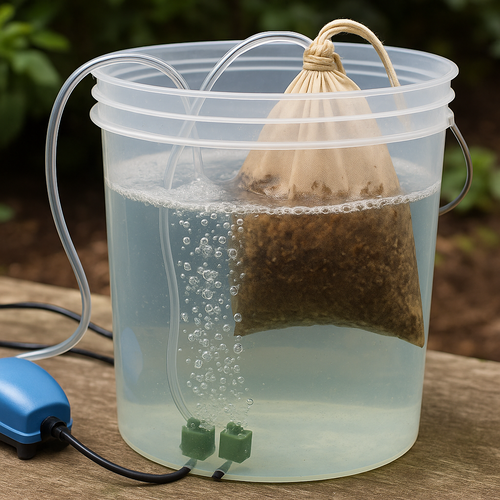
Step 6. Aerated Compost Tea – The Activation Moment
Every 3 weeks, I treat the entire garden with aerated compost tea.
This is the biological ignition of the season. You’ve prepared the base, and your soil is ready to welcome a new team of helpers.
I follow Elaine Ingham’s method.
Basic recipe for aerated compost tea (Elaine Ingham style)
- 1 cup of high-quality compost
- 5 gallons (about 20 liters) of non-chlorinated water
- 1-2 tablespoons of unsulfated molasses, fish emulsion, seaweed\ kelp extract, humates, herbal extracts – you can safely add a little of whatever you have on hand from this list.
- Intensive aeration for 24 hours – I use a good aquarium air compressor. For larger gardens, it’s worth considering a dedicated air compressor.
The tea should have an earthy, fresh scent. If it’s sour, discard it.
Apply at temperatures above 12°C (54°F) within 4 hours of production. This is important.
Spray:
- Freshly unfurled leaves (on all sides)
- Stems
- Soil surface
The goal is to inoculate the plant and soil with beneficial microorganisms.
This creates biological competition with pathogens. Without live microbes, plants rely solely on chemical defenses. With microbes, they gain allies.
Step 7. Choose Companion Plants Wisely
Roses shouldn’t be grown alone. A queen always needs an entourage.
You need plants that attract predators, which happily feed on aphids, thrips, spider mites, and caterpillars. They’re your free garden patrol, working 7 days a week.
I use:
- Dill and fennel – attract lacewings, parasitic wasps, and ladybugs.
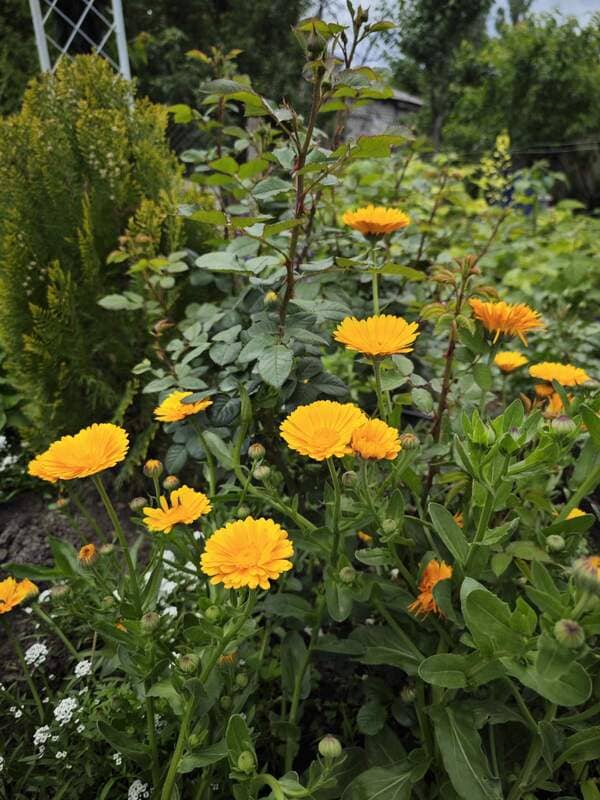
- Calendula – supports beneficial insect populations.
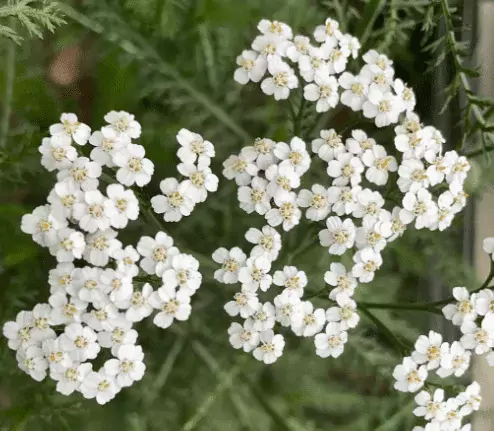
- Yarrow – attracts predatory wasps.
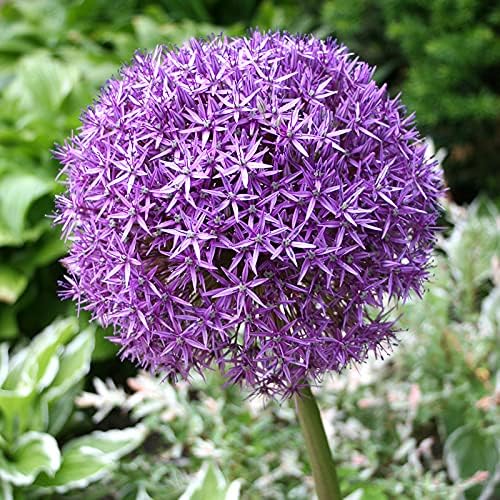
- Alliums – help repel some pests.
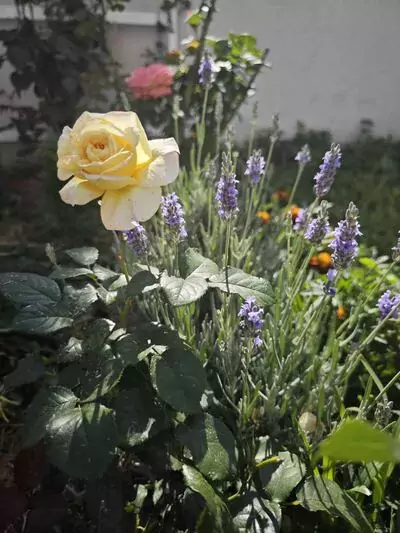
- Lavender – supports pollinator populations.
Companion plants aren’t decoration. They’re pest control. If your roses are isolated, pests will concentrate on them.
You can read more about companion plants here – https://rosehomegarden.com/companion-plants-for-roses/
Step 8. Mulch — Never Skip This
Mulching is more than just a nice-to-have. Bare soil dries out, overheats, and loses its microflora. Bare soil is the number one enemy of your hard-won mycorrhizae. Think about it.
I mulch with freshly cut grass clippings, about 4-6 cm thick. In my garden, mulch disappears quickly because the soil is “alive.” Earthworms and microorganisms convert it into food. Therefore, I constantly replenish the mulch layer throughout the season.
Mulch:
- Stabilizes temperature
- Retains moisture
- Nourishes soil organisms
- Prevents weed competition. I’ve forgotten what it’s like to weed during the second season of active mulching. Weeds in my garden are more like occasional guests than residents.
Without mulch, soil health slowly deteriorates. So I never skip this step.
Step 9. Herbal Infusions for Gentle Nutrition
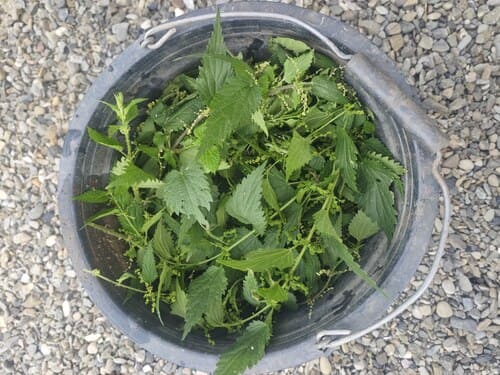
In early spring, I prefer soft nitrogen from plants rather than synthetic fertilizers. I use nettles or comfrey. Any herbs from your garden will work just fine. The more viscous the weed, the better. We walk around the garden, find anything resembling a weed, and put it in a bucket, roots and all. I don’t pick nettles like that; of course, I save them because they’re a treasure for the garden, and I try to propagate them. Therefore, I only pick the stems.
How I prepare the infusion:
Fill the container halfway with fresh, chopped herbs.
Add water until the infusion is completely covered.
Let it ferment for 7 days, stirring occasionally. When the bubbling stops, strain.
Add water until the infusion is completely covered.
Let it ferment for 7 days, stirring occasionally. When the bubbling stops, strain.
Dilution for roses:
- 1 part infusion
- 10 parts water
Use only for watering the roots.
This ensures a gentle delivery of nitrogen, potassium, and micronutrients without shocking the plant.
Strong fertilizers stimulate growth. Herbal infusions support growth and nourish the soil’s biota.
Step 10. Whey Spray for Leaf Protection
My secret weapon against all fungal diseases. When the leaves are fully expanded, I spray the leaves and stems with the following solution:
- 1 liter of whey
- 5 liters of water
Only at this stage can I add 1 teaspoon of chelated complex fertilizer. This is the only time I use complex fertilizers.
The whey forms a protective microbial film on the leaves, helping to prevent fungal diseases. Chelated nutrients ensure the absorption of micronutrients directly through the leaf surface.
This treatment strengthens the leaves before disease can develop. After that, the system starts working.
We don’t apply this solution to the soil – we don’t want excess calcium there – we use it only on the foliage. The frequency of foliar spraying depends on the garden’s condition. If the garden was very diseased last year, you can spray 3-4 times a month. If the garden is relatively healthy, a couple of times a month is sufficient. We also monitor the weather – if it’s been raining, we repeat the treatment. You can use any natural dairy product for the mixture. But I prefer whey because it’s not visible on the leaves and doesn’t clog the sprayer.
What Can Go Wrong
Most gardeners think organic methods fail because they are “too weak.”
That’s not the problem.
They fail because the sequence is broken, timing is wrong, or biology is applied to inactive soil.
This protocol works, but only if executed correctly. Here are the mistakes that undermine it.
1. Starting Too Early
Applying Metarhizium or Trichoderma to cold soil does nothing.
If soil temperature is below 8–10°C (46–50°F), microbial activity is minimal. The fungi remain inactive. Meanwhile, pests and pathogens resume their cycles as temperatures rise.
If this happens → wait. Measure soil temperature, not air temperature.
Biology responds to soil conditions, not calendar dates.
2. Incomplete Garden Cleaning
Leaving old leaves under roses is the fastest way to sabotage your work.
Metarhizium and Trichoderma are not magic erasers. If infected debris remains, fungal spores simply reinfect new growth. Most gardeners clean visually. That’s not enough. The plant’s base must be completely clear. If a black spot was present last year, sanitation must be strict.
3. Using Poor-Quality Compost
Compost is not automatically beneficial. If it smells sour, contains unfinished material, or was made without oxygen, it introduces imbalance instead of support. Compost must be mature, crumbly, and earthy.
Without quality compost, compost tea will also fail because you are multiplying weak biology.
4. Brewing Compost Tea Incorrectly
Aeration is not optional.
If the tea is not actively aerated for 24 hours, harmful anaerobic organisms can dominate. The smell tells you everything.
Earthy smell – safe.
Rotten smell – discard immediately.
Rotten smell – discard immediately.
Temperature also matters. Below 12°C (54°F), microbial multiplication slows significantly.
If tea is weak, it will not colonize leaf surfaces effectively.
5. Applying Compost Tea in Strong Sun
Spraying leaves in bright midday sun reduces microbial survival.
Ultraviolet light kills microorganisms quickly.
Apply in the early morning or evening, when temperatures are moderate.
Otherwise, you introduce microbes — and the sun destroys them within hours.
6. Skipping the Waiting Intervals
This protocol has rhythm.
Metarhizium first. Compost next. Trichoderma one week later. Compost tea one week after that.
If you randomly overlap treatments, organisms compete before establishing. The result becomes inconsistent. Timing creates order. Without order, biology competes rather than cooperates.
7. Over-Fermented Herbal Infusions
Nettle or comfrey infusions left too long become excessively strong. If the liquid turns very dark and smells aggressively putrid, it may stress roots when applied. Dilution must be 1:10 for root watering. Organic does not mean harmless. Concentration matters.
8. Applying Whey Too Early
Whey spray must be applied when leaves are fully expanded. Young tender leaves are more sensitive. Early application can cause spotting under strong sunlight. Apply during mild weather and always dilute correctly: 1 liter of whey to 5 liters of water. More is not better.
9. Mulching Too Thick or Too Close to Stems
Mulch is critical. But piling it against the crown creates moisture retention around the base, which can lead to rot. Keep 2–3 inches of depth. Leave a small gap around stems. Mulch feeds the soil. It should not suffocate stems.
10. Mixing Biological and Chemical Systems
This is one of the biggest errors. If you apply chemical fungicides after introducing Trichoderma, you kill the beneficial fungi you just established. If you rely on insecticides, Metarhizium populations decline. You must choose a system. Mixing approaches weakens both.
11. Expecting Immediate Visible Results
Biological systems are preventative. You may not “see” results immediately. What you see is the absence of problems later. If you expect dramatic visual changes within days, you misunderstand the process. This protocol prevents escalation. It does not create instant growth.
12. Ignoring Soil Moisture
Beneficial fungi need moisture to establish.
Extremely dry soil after application reduces colonization success.
After treatments, ensure moderate soil moisture, neither waterlogged nor dry.
Living soil requires balance.
This Is My Entire Spring Protocol
No chemicals. No emergency sprays. No reactive gardening.
If you prepare the soil, introduce biology, and protect early growth, roses regulate themselves.
Most gardeners try to fix visible problems.
I remove the conditions that create them.
I remove the conditions that create them.
If you want a deeper diagnostic approach to rose problems and precise corrections, my book “Why Doesn’t My Rose Grow and Bloom? – 100 Reasons and Solutions” explains the real causes behind weak growth and poor flowering.
For structured seasonal tracking, the Rose Garden Planner 2026 – Log Book helps you record timing, treatments, and plant responses. Without records, improvement is random.
And if you want the full soil-first philosophy behind this system, read “Revolution in the Rose Garden – Organic Rose Gardening.”
Good roses are not luck.
They are the result of correct timing and biological structure.
They are the result of correct timing and biological structure.
This is where the season truly begins.
Rose gardening books


Step into a calmer, more confident rose season. With Ann Devis’s rose gardening books and planner, you’ll get simple organic routines, proven tips, and checklists that keep your roses thriving – from first bud to last bloom.

Organic rose gardener and author.
I share practical, soil-first methods tested in my own garden to help roses grow strong, healthy, and bloom naturally without chemicals.
Ann Devis
FAQ
Start when soil temperatures reach at least 8–10°C (46–50°F). Biological treatments like Metarhizium and Trichoderma require active soil conditions to work properly.
No. Compost feeds soil organisms. Compost tea distributes active microorganisms onto leaves and soil surfaces. They serve different functions.
Yes, when diluted correctly (1:5 with water). It should be applied only after leaves are fully expanded and in mild weather conditions.
No. Chemical fungicides can kill beneficial fungi, such as Trichoderma. Mixing systems cancels the biological effect.
Without mulch, soil dries faster, microbial life declines, and plant stress increases. Healthy soil biology depends on continuous organic cover.