How to Make Roses Bloom Abundantly: A Practical Organic Guide

I’ve been growing roses for many years, and I’ve learned one thing: abundant blooming is not magic and not luck. It’s the result of a few simple things done at the right time. Here I’ve gathered everything that truly works in my garden, without harsh chemicals or complicated jargon.
First, an important warning about first-year roses.
If you planted a rose this season, I have some unpopular news for you. Don’t try to force it into lush blooming right away. During the first year, the rose has a different job – building roots and becoming strong. If you see buds on a young plant:
  • Own-root roses or grafted roses on rose rootstock – remove almost all buds and leave only one or two, just to see the flower. Everything else should go. The rose needs to spend energy on roots, not flowers.
  • Roses grafted onto vigorous rootstock – you can leave three to five buds, but as soon as the flower fades, cut it off immediately. Don’t let the rose form hips because that steals energy.
  • Small hybrid tea or floribunda bushes – if the rose is under 30 cm tall, remove all buds. Let it grow first.
The exception is miniature roses and groundcover varieties. They bloom freely from the first year because their roots develop faster than tall varieties.
Believe me, it’s better to wait one season than spend the next three years struggling with a weak bush that never gains strength.

The Main Secret Many People Miss: Grass Mulch

I mulch my roses with freshly cut grass, and honestly, it may be the most important thing I do for them. Here’s why.
Grass protects the roots from heat. Georgian summers can be extreme – cool mornings followed by scorching afternoons. Without mulch, the roots literally cook in the soil, the rose goes into stress, and stops drinking water properly. A layer of grass 8-10 cm thick can lower soil temperature by around ten degrees. The roots keep working calmly even when it’s 35°C outside.
Grass holds moisture. When I water deeply, the water sinks into the soil instead of evaporating from the surface in two hours. Mulch creates an airy layer that retains moisture for days. That means less frequent but deeper watering. Roots grow downward rather than sitting near the surface, where they can dry out during the slightest drought.
Grass helps roses establish faster. When I plant a new rose, it’s under stress – damaged roots, unfamiliar soil, different microbes. Fresh grass contains millions of living cells. As it decomposes, it creates a whole community of beneficial bacteria and fungi around the roots. These microbes feed the rose, protect it, and help it adapt. Without this, a rose may struggle for weeks. With mulch, it comes back to life much faster.
Grass also feeds the rose naturally. It contains nitrogen, potassium, phosphorus, and trace minerals. Not as much as store-bought fertilizers, but nutrients are released slowly and evenly, without sudden spikes. The rose doesn’t explode into weak leafy growth. Instead, it steadily gains strength and forms buds.

How to mulch properly:

  • Cut the grass before it flowers, or you’ll spread weeds.
  • Don’t use grass from lawns treated with chemicals because it destroys the microbial life you want.
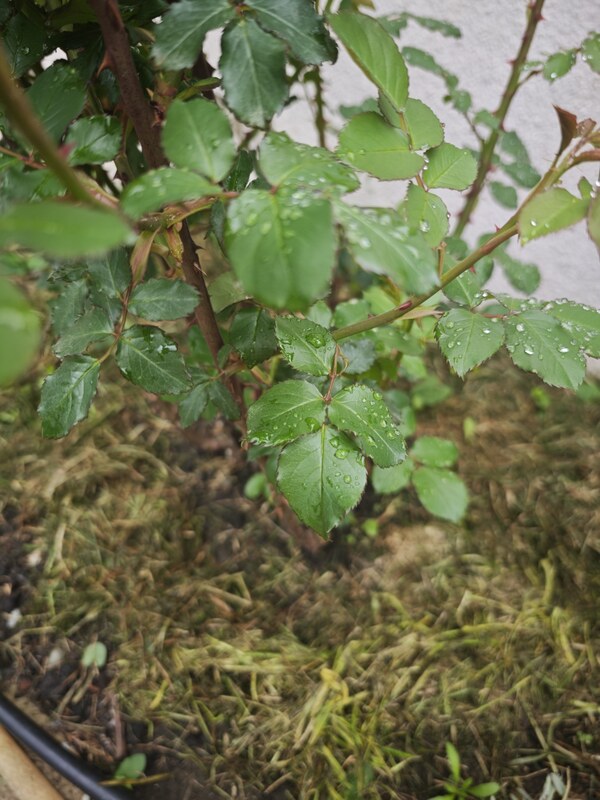
  • Water the soil before mulching. Dry grass on dry soil will pull moisture upward.
  • Apply a 5-7 cm layer. 
  • Leave a bare ring around the base of the rose. Decomposing grass creates heat and moisture. If it touches the crown directly, rot may begin. Keep 5-7 cm of space.
  • Add fresh grass every three to four weeks on top. This keeps the mulch active instead of turning into dry debris.
A useful trick: if the grass layer is too thick, it may compact and rot without airflow. I do this instead: first, a 5 cm layer of grass, then about 3 cm of pine bark or wood chips on top. The bark prevents compaction and slightly acidifies the soil, which roses love. Sometimes I alternate layers: grass, dry leaves, grass again. Different materials break down at different rates, so the soil stays biologically active

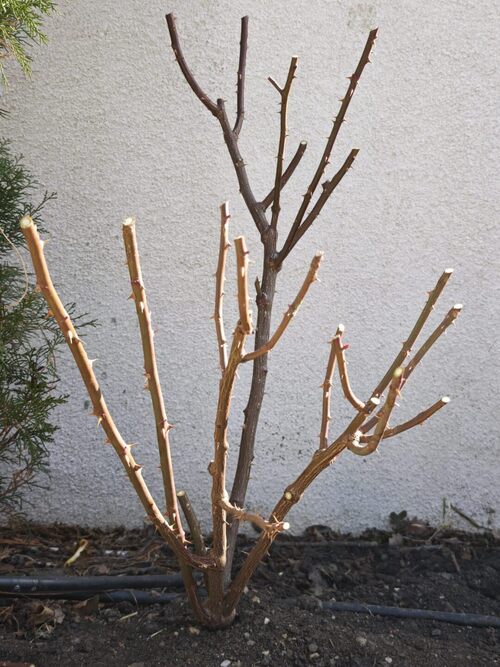
Spring Pruning: Don’t Be Afraid to Cut

When winter ends, and the rose wakes up, the first job is pruning. Many people are afraid of overdoing it. Roses forgive almost everything except neglect.
  • Remove all winter damage. The cut should be white or green inside, never brown. Brown wood is dead – cut lower.
  • Shape the bush like an open bowl. The center should stay airy and open. Remove all thin shoots growing inward, as they block airflow and light, which directly leads to disease.
  • Shorten the remaining canes. Hybrid teas should be cut back by about one-third. Floribundas by about one-quarter. This stimulates side shoots, which carry flowers.
  • Remove all shoots thinner than a pencil. They rarely produce quality blooms and only overcrowd the plant.
spring pruning rose bush spring rose garden preparation

Feeding by Growth Stage: What and When

I don’t use mineral fertilizers like NPK. I only use organic inputs that work with the soil ecosystem, not against it.

Stage One: The Rose Wakes Up

(March, after snow melt)
Vermicompost. Worm compost is my foundation. I spread a 2-3 cm layer around the bush and cover it with grass mulch. I don’t dig it deeply into the soil because microbes will naturally move nutrients downward. Vermicompost doesn’t force explosive growth. It balances the plant’s metabolism and prevents the situation where leaves grow wildly, but buds never appear.
Nettle tea. I soak nettles in water at a ratio of 1:10 for at least two weeks. Then I dilute it again to 1:20 and water once at the root zone. It gently wakes the rose after winter and provides light nutrition for early growth.
Chitosan. I spray it on the leaves. It activates the rose’s immune system before diseases appear. Prevention is always easier than treatment.
 

Stage Two: Bud Formation

(Late March to April, when shoots reach 15-20 cm)
This is the most important period. What you do now determines whether the buds will be large and plentiful.
Fish hydrolysate. I apply it twice at 14-day intervals, either as a root drench or a foliar spray. It contains phosphorus in an organic form that roses absorb more easily than mineral phosphorus. Phosphorus is essential at this stage because it drives bud formation. I apply it in the evening because the smell attracts flies. After watering, I lightly cover it with soil.
Seaweed meal. I alternate it with chitosan every 10-12 days. Seaweed contains natural compounds that stimulate cell division. In roses, this simply means more buds per stem. Together, chitosan and seaweed form a powerful combination: chitosan strengthens cell walls, while seaweed stimulates growth. The buds become dense, large, and well-formed.
Boron. Once a month, I spray boric acid on the leaves at 0.5 g per liter of water. Boron is essential for bud formation. But this is critical: never exceed the dosage. Too much boron can stop flowering entirely. Excess boron blocks sugar movement into the buds, and they dry up before fully developing. If you use humic acids together with boron, reduce the dosage to 0.3 g per liter because humates improve absorption dramatically.
Potassium. Necessary for large flowers and rich color. I use wood ash tea: one tablespoon of wood ash in ten liters of water, steeped for a day, then strained and watered in. But here’s an important warning. Ash strongly raises soil pH. If you apply dry ash directly to the soil, important micronutrients like iron, zinc, manganese, and boron become unavailable. The rose gets potassium, but it begins to show signs of deficiency. So I use only liquid ash tea, and only if I know my soil is not alkaline. If you’re unsure, skip it and rely on fish hydrolysate and seaweed because they also contain potassium.
Humic acids. These are not fertilizers themselves. They help bind micronutrients in the soil and make them available to roses. Especially useful together with boron because boron absorption is much weaker without humates.

my superheroes in the garden

Stage Three: Buds Have Formed

(May, when colored buds are visible)
Stop nettle tea and fish hydrolysate. At this stage, active nitrogen and phosphorus are no longer needed. Nettle tea can push the rose into vegetative growth instead of flowering.
Continue seaweed and chitosan. Seaweed encourages bud opening and larger flowers. Chitosan protects against powdery mildew and black spot, which often attack during this vulnerable stage.
Stop boron. Buds are already formed. Extra boron now only creates problems.
Keep watering consistently. A lack of water during bloom opening results in smaller flowers that fade quickly. Water less often but deeply. Around 20-30 liters for a mature bush every 5-7 days. Leaves should dry before evening, as wet foliage overnight can encourage fungal disease.
my roses garden Ann Devis

Stage Four: Active Blooming

Deadheading. As soon as petals fall, cut the stem back to the first five-leaflet leaf for hybrid teas or to the second leaf for floribundas. This switches the rose from seed production back into bud production. Otherwise, it spends energy forming hips, and the second flush becomes weak or fails to occur.
Recovery after the first flush. Roses are exhausted after heavy flowering. I give a very weak nettle tea dilution at 1:30 just to refresh the plant without overfeeding it. Five days later, I spray seaweed extract on the foliage.
Maintain mulch. During heat waves, I add fresh grass regularly. Decomposing mulch becomes a natural feeding system for the second flush.
Boron can be used once more if the second flush is weak, but only if bud production is clearly poor.

Disease Prevention: Start Before Symptoms Appear

The first flowering period is when roses are most vulnerable. Young growth is soft, the weather is unstable, and fungal diseases attack aggressively.
Chitosan. I spray every two weeks starting from leaf emergence. It’s not a poison – it’s an immune stimulant. Roses begin producing their own defense compounds, and a thin protective film forms on the leaves, making fungal infection harder.
Bacillus subtilis. This beneficial bacterium lives on leaves and in soil. It crowds out harmful microbes and releases substances that suppress pathogens. It works like a living shield. I use it instead of Bordeaux mixture because it’s gentler and fully organic. I spray in early spring as leaves begin opening and alternate it with chitosan. Bacillus is especially effective against black spot and powdery mildew – the two diseases that often ruin the first flush.
Trichoderma. A beneficial soil fungus that competes with pathogens. It occupies space in soil and on plant surfaces before harmful fungi can establish themselves.
Why this matters: producing flowers requires enormous energy. If the rose spends its strength fighting powdery mildew, the blooms become small, and the foliage becomes damaged. Prevention is always cheaper and easier than treatment.

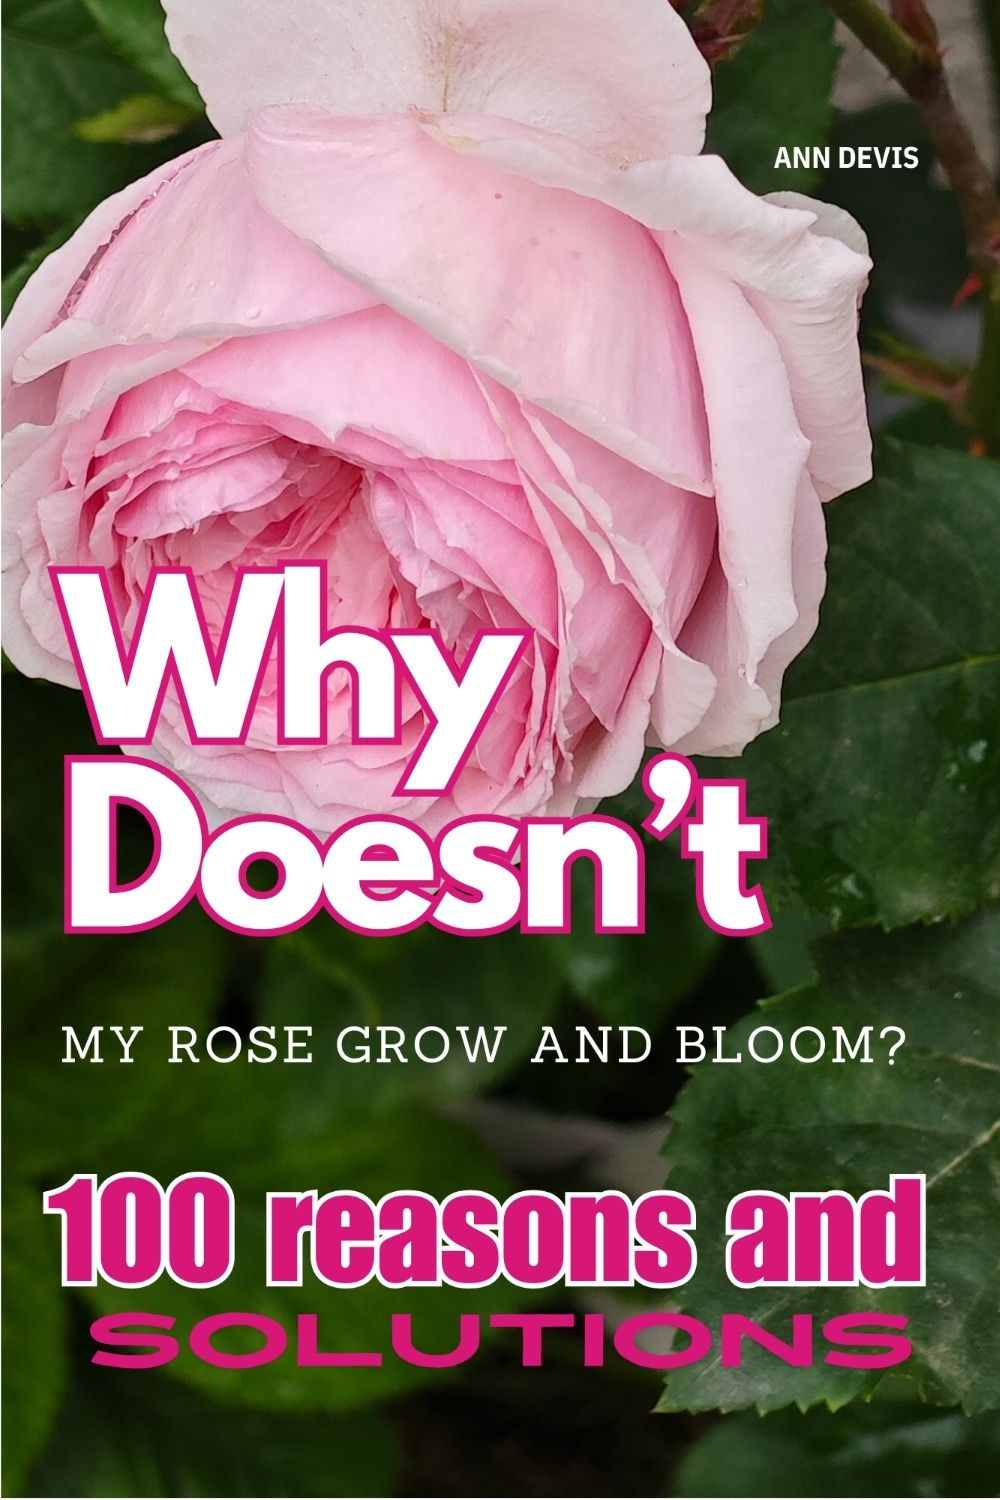
Why Your Roses Stop Blooming: The Hidden Problems Most Gardeners Miss

If your roses are dropping buds, the new shoots look weak, or the blooming gets worse year after year, you are not alone. I’ve been through the same thing in my own garden. Again and again, I realized the problem was rarely a missing product or spray. Most of the time, it came down to timing, nutrition, or growing conditions that had quietly slipped out of balance.

That’s exactly why I wrote “Why doesn’t My Rose  Grow and  Bloom? – 100 Problems and Solutions.” It’s a book that teaches you how to read the signals your rose gives you every day. Once you understand the cause, you stop guessing and start fixing the real issue.

One habit changed everything for me: keeping garden records. I write down what I sprayed, when I mulched, what the weather was like, and how the roses responded. After two seasons, clear patterns started to appear – which feedings truly worked, which timing mistakes caused problems, and when chitosan or Bacillus subtilis saved the bushes from powdery mildew. That notebook became the most valuable gardening tool I own.

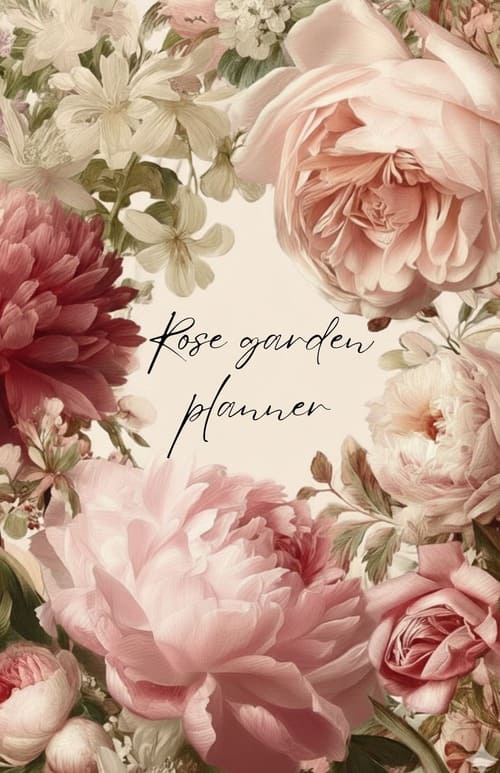
That’s why I created the “Rose Garden Planner 2026 – Gardener’s Journal.” Every page is built around real seasonal tasks: pruning dates, feeding schedules, mulching timelines, and disease prevention routines. No empty pages you forget to fill in. Just a structured system that turns every season into a lesson you can build on year after year.

And if you’re tired of mysterious rose problems altogether, start with the soil. In my garden, I learned that healthy soil, active microbes, and simple organic methods solve more problems than endless spraying ever will. I gathered those principles in my book “Revolution in the Rose Garden ” – practical methods that work in real home gardens, not just on paper.

Rose gardening books

Step into a calmer, more confident rose season. With Ann Devis’s rose gardening books and planner, you’ll get simple organic routines, proven tips, and checklists that keep your roses thriving – from first bud to last bloom.

Roses are not delicate divas. They respond generously to good care. The key is not to rush them, not to force them, and not to overfeed them. Give them healthy soil, protect the roots with mulch, feed lightly and at the right time, and prevent disease before it starts.
Abundant blooming is never the result of one magical fertilizer. It’s the result of what you did correctly three months earlier.

FAQ

This is one of the most frustrating problems gardeners face. There are three common causes:
Thrips inside the buds. These tiny insects damage the tissue from within. Pull a bud apart and look for slender insects or dark specks inside. The bud turns brown internally, becomes fuzzy, and never opens.
Treat with Beauveria bassiana.
Sudden cold snap after warm weather. Rose development is sensitive to temperature swings. If temperatures drop below 10°C after a warm spell, buds can “stall” in development. Cover bushes at night during unstable weather.
Water sitting on closed buds combined with poor airflow. This causes a condition called “flower balling,” where buds rot before opening. Ensure good spacing between plants and water at the base, not overhead.
This is partly natural, but you can improve it significantly. The key is deadheading immediately after the first petals fall. If you let the hips form, the rose redirects all energy into seed production instead of new buds. Cut back to the first five-leaflet leaf for hybrid teas, or the second leaf for floribundas.
Also, check your watering — many gardeners reduce irrigation after the first bloom, thinking the season is over. Roses need consistent deep watering to produce quality second-flush flowers.
. Finally, give a light recovery feed: diluted compost tea or seaweed extract five days after the first flush ends.
Yes — this is the hardest advice to follow, but the most important. First-year roses need to build roots, not flowers.
  • Own-root roses or those on weak rootstock: Remove all buds except one or two, just to confirm the flower color.
  • Grafted roses on vigorous rootstock: Leave 3–5 buds, but cut off faded blooms immediately — never let hips form.
  • Small bushes under 30 cm: Remove every single bud. Let the plant grow first.
The exception is miniature and groundcover roses — they can bloom freely from year one because their root systems develop faster.
Check these four things in order:
Not enough sun. Roses need at least 6 hours of direct sunlight daily to generate the energy required for blooming.
. Less sun = weak growth and few or no flowers. If transplanting is possible, move to a sunnier spot in spring or fall.
Too much nitrogen. Excessive nitrogen from fresh manure or strong compost tea pushes lush leafy growth at the expense of buds.
. Switch to lower-nitrogen feeds like seaweed extract and add potassium sources.
Wrong pruning timing. Some old garden roses (Alba, Gallica, Damask) bloom only on second-year wood. If you prune them in spring like modern roses, you remove all the flower buds.
. Research your variety before cutting.
Reversion to rootstock. If your grafted rose suddenly produces different flowers or stops blooming entirely, the graft may have failed, and the rootstock has taken over. Look for basal shoots with different leaf shapes or thorn patterns.
Only with specific inputs. Stop nitrogen-heavy feeds like nettle tea or fish emulsion once colored buds appear — they push vegetative growth instead of flowering.
Continue with:
  • Seaweed extract — stimulates bud opening and increases flower size
  • Chitosan — protects against powdery mildew and black spot during this vulnerable period.
  • Potassium — supports petal development and vibrant color
Avoid boron during active blooming — buds are already formed, and excess boron can cause problems rather than help.
Start before symptoms appear. The first flowering period is when roses are most vulnerable — young growth is soft, and the weather is unstable.
Bacillus subtilis — spray as leaves begin opening in spring. This beneficial bacterium colonizes leaf surfaces, crowds out pathogens, and produces natural antifungal compounds. It is especially effective against black spot and powdery mildew.
Chitosan — alternate with Bacillus every 10–14 days. It stimulates the rose’s own immune system and forms a physical barrier on leaves.
Trichoderma — apply to soil and lower stems. This beneficial fungus competes with disease organisms for space and resources.
Always water at the base, not overhead, to keep foliage dry — moisture on leaves is what allows fungal spores to germinate.
Deep, infrequent watering beats light, frequent sprinkling. Roses need about 2.5–5 cm of water weekly from rain or irrigation. Apply 20–30 liters per mature bush every 5–7 days, depending on weather and soil. Water early morning so leaves dry before evening — wet foliage overnight invites fungal disease.
In hot climates like Tbilisi, increase frequency during peak summer, but never reduce the volume per watering. Shallow watering produces shallow roots, and shallow roots cannot support abundant blooming.

Leave a Comment

Sign In

Register

Reset Password

Please enter your username or email address, you will receive a link to create a new password via email.

Scroll to Top