Why healthy soil is the secret to spectacular roses and how to bring your garden back to life organically
spring rose garden preparation
The first warm days of March might have you eager to get to work in your rose beds, but after years of experience, I’ve found that the best thing you can do for your roses now is to focus on the soil, not on visible growth. Healthy soil is what determines your summer success.
Why Soil Comes First
Roses are heavy feeders with complex root systems that can reach down 3–4 feet when given the chance. They’re also notoriously prone to fungal diseases and pest pressure. You can spray and fertilize all season long, but if your soil biology isn’t thriving, you’re essentially running on a hamster wheel — treating symptoms rather than building resilience.
Healthy soil acts as your rose garden’s immune system. A single teaspoon of living soil contains roughly one billion microorganisms — bacteria, fungi, protozoa, and beneficial nematodes — that cycle nutrients, suppress disease, and create the soil structure roses need to develop those deep, anchoring roots. After a long winter, this biological community has gone dormant. Our job in early spring isn’t to “fix” the soil with chemicals, but to wake it up gently and feed the organisms that will feed our plants all season long.
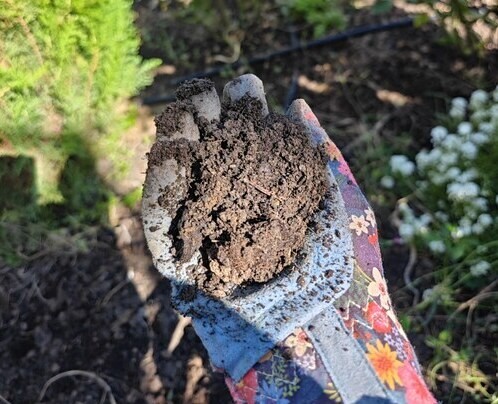
Step 1: Assess Before You Disturb
Before you start, scoop up some soil and squeeze it to test its texture.
- If it forms a ball that crumbles when poked, you’re in good shape. The freeze-thaw cycles of winter have done their job, naturally aerating your soil structure.
- If it stays in a tight ball or feels slick, you’ve got compaction or clay-heavy soil that needs organic matter.
- If it won’t hold together at all, it’s probably too sandy and needs humus to improve water retention.
The squeeze test saves you from the single biggest mistake gardeners make in March: working soil that’s too wet. If water squeezes out between your fingers, wait. Tilling or even walking on saturated soil destroys the delicate pore spaces your roots and soil life depend on. Patience here pays dividends all summer.
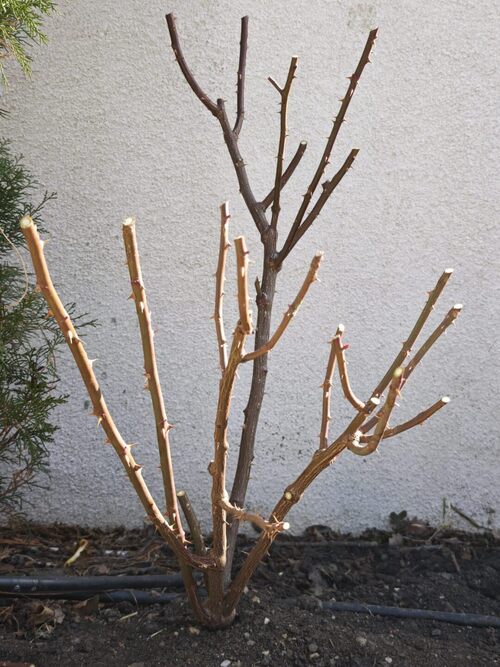
Step 2: Gentle Aeration (No Tilling Required)
Once your soil passes the squeeze test, resist the urge to turn it over. Tilling destroys fungal networks — the microscopic threads that extend your roses’ root reach by up to 80% and help plants access water and nutrients they couldn’t reach on their own.
Instead, use a broadfork or a standard garden fork to loosen the soil to a depth of about 12–18 inches. Push the tines in, rock the handle back to lift, and crack the soil slightly, then pull straight out. Do not flip the soil over. You’re creating channels for air, water, and roots without disrupting the microbial neighborhoods that have been establishing themselves for years.
Work from pathways or use a board to stand on if you must walk in the beds — compacted soil is the enemy of the deep, vigorous root systems that make roses drought-tolerant and floriferous.
Step 3: Feed the Biology (Not Just the Plants)
Here’s where we shift from conventional thinking. Rather than dumping synthetic fertilizer that pushes fast, weak growth, we’re going to inoculate the soil with beneficial microorganisms that will provide sustained, balanced nutrition throughout the season.
Beneficial Fungi & Biological Inoculants
This is my secret weapon, and it’s backed by solid science. I apply products containing three specific beneficial organisms:
- Trichoderma — An aggressive colonizer that outcompetes pathogenic fungi like black spot and powdery mildew. It also breaks down organic matter into forms roses can absorb.
- Metarhizium — An entomopathogenic fungus that targets soil-dwelling pests like Japanese beetle grubs and root weevils before they can attack your plants.
- Beauveria bassiana — Another beneficial fungus that controls thrips, aphids, and mites by penetrating their exoskeletons, without harming pollinators or beneficial insects.
These aren’t pesticides; they’re biological allies that establish in your soil and on plant surfaces, creating a protective environment. I work these powders or granules into the top inch of soil around each rose, following product rates carefully.
Step 4: Aerated Compost Tea — Liquid Soil Therapy
If I could only do one thing for my roses each spring, this would be it. Aerated compost tea (ACT) is essentially a microbial smoothie, a brewed concentrate of beneficial bacteria and fungi extracted from high-quality compost.
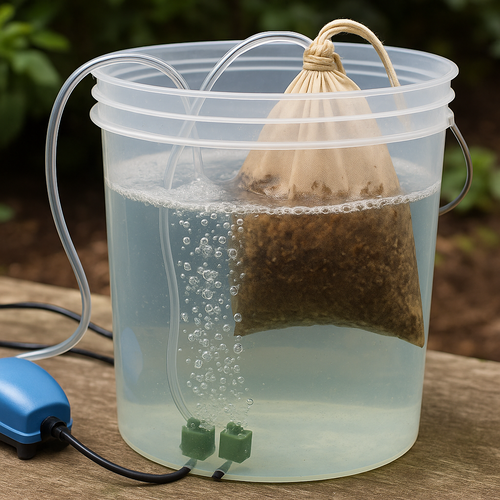
How to Make It (Simple Version)
- Fill a bucket with mature, finished compost (not fresh manure or kitchen scraps).
- Add non-chlorinated water — rainwater is perfect, or let tap water sit 24 hours to off-gas chlorine, which kills microbes.
- Bubble it with a simple aquarium air pump and stone for 24–36 hours. Aeration selects for aerobic (oxygen-loving) organisms, the beneficial ones, while suppressing anaerobic pathogens.
- Strain through burlap or old pantyhose to remove solids.
The resulting liquid should smell earthy and sweet, not sour or rotten. If it stinks, you’ve gone anaerobic — dump it and start over.
Application Technique (Critical)
Here’s where timing and technique matter enormously:
Wait for the right weather: Apply your compost tea and biological inoculants on an overcast day or in late afternoon, when the sun isn’t beating down. UV light kills microbes almost instantly, and you want these organisms to establish in the soil, not fry on the surface.
Moist soil is mandatory: The soil should be damp but not saturated — think of a wrung-out sponge. Dry soil sucks moisture (and microbes) away before they can colonize. Water lightly the evening before if needed.
Spray everything: I use a watering can or backpack sprayer to drench the soil surface around each rose, then spray the canes and any remaining dormant foliage. Yes, you read that right — spray the woody stems too. These surfaces will soon be covered in new growth, and establishing beneficial fungi here creates a protective barrier against disease spores that blow in on spring rains.
The tea runs down the canes and into the soil, carrying biology exactly where it’s needed. I apply this twice in early spring — once when I first wake the beds, and again just as buds begin to swell.
Step 5: Top-Dress with Organic Matter
After your biological applications have soaked in (give it a few hours), add a 2-inch ring of finished compost around each rose, keeping it slightly away from the crown to prevent rot. Don’t dig it in — let the worms and soil organisms pull it down. This is nature’s tillage, and it’s far more effective than anything you can do with a tool.
If your soil test shows deficiencies (and March is the perfect time to send samples to your extension service), amend now:
- Low nitrogen: Blood meal or fish meal
- Low phosphorus: Bone meal (critical for rose bloom production)
- Low potassium: Greensand or kelp meal
But here’s the truth: if you’re building soil biology with compost tea and beneficial fungi, you often need far less supplemental fertilizer than conventional wisdom suggests. The microbes unlock nutrients already present in your soil and organic matter.
Step 6: Mulch — The Finishing Touch
Once your soil is biologically activated and fed, lock in that goodness with 3 inches of organic mulch. Shredded leaves, straw, or pine needles all work beautifully for roses.
Mulch moderates soil temperature (roses hate temperature swings at the root zone), retains moisture so you’re not constantly watering, and continues feeding the soil as it slowly decomposes. Just keep it an inch or two away from the rose canes to prevent crown rot.
The Payoff: What to Expect
If you follow this soil-first protocol, you won’t see immediate results, and that’s actually the point. Unlike synthetic fertilizers that push a quick flush of growth, biological activation builds systemic resilience.
Over the coming weeks, you’ll notice:
- Darker, more vigorous foliage that holds up to summer stress
- Fewer disease issues — black spot and mildew pressure drops noticeably when beneficial fungi occupy leaf surfaces.
- Deeper root systems that find water during dry spells
- More blooms over a longer season, with stronger fragrance (stressed plants produce a weak scent)
And perhaps best of all, less work. Once you’ve established this biological foundation, maintenance becomes observation and occasional reinforcement rather than constant intervention.

It’s tempting in March to focus on what we can see — pruning canes, clearing debris, maybe adding a splash of color with early annuals. But the gardeners I know with the healthiest, most productive rose gardens share one habit: they spend more time thinking about soil than flowers.
Your roses have survived winter. Their roots are down there, waiting for the signal that it’s safe to grow. That signal isn’t warmth alone — it’s the presence of living soil, teeming with the microscopic allies that turn dirt into a thriving ecosystem.
Wake up your soil first. The roses will take care of the rest.
Ready to stop guessing and start growing?
If this soil-first approach resonates with you, there’s more where that came from. My books and planner are designed for gardeners who want to understand why things work, not just follow steps blindly.
Cut through the confusion. This book helps you diagnose problems at their root, whether it’s soil biology, nutrition, timing, or growing conditions, so you fix the cause instead of chasing symptoms.
Track your compost tea brews, Trichoderma applications, weather patterns, and plant responses. One season of notes teaches you more than years of guessing. Make every mistake count toward mastery.
The complete framework for soil-first success. Beneficial fungi, no-till techniques, organic inputs, and practical routines that actually work in real gardens, not just theory.
Because healthy roses start with healthy soil, understanding beats spraying every time.
Rose gardening books


Step into a calmer, more confident rose season. With Ann Devis’s rose gardening books and planner, you’ll get simple organic routines, proven tips, and checklists that keep your roses thriving – from first bud to last bloom.

FAQ: Waking Up Your Rose Garden Soil in Spring
Start as soon as your soil passes the “squeeze test” — grab a handful and squeeze. If it forms a ball that crumbles when poked, you’re good to go. If water drips out, it’s too wet, and you’ll damage soil structure by working it. For most regions, this means mid-to-late March, but let your soil tell you when it’s ready, not the calendar
It depends on the type and amount. Synthetic, water-soluble fertilizers — especially those high in phosphorus — can actually suppress beneficial fungi like mycorrhizae. When plants sense abundant nutrients, they become less receptive to fungal partnerships.
The solution? Use organic amendments like compost, bone meal, and blood meal in moderate amounts based on soil tests. Feed the soil, not just the plant.
It’s a brewed concentrate of beneficial bacteria and fungi extracted from high-quality compost using aeration. You bubble compost in non-chlorinated water for 24–36 hours with an aquarium pump, which selects for oxygen-loving (aerobic) organisms the beneficial ones — while suppressing harmful anaerobic pathogens
Timing matters enormously:
- Apply on overcast days or late afternoon — UV light kills microbes instantly.
- Soil should be damp but not saturated (like a wrung-out sponge)
- Drench the soil around each rose, then spray the canes and any remaining foliage — yes, the woody stems too. This creates a protective barrier as new growth emerges.
Apply twice in early spring: once when you first wake the beds, and again as buds begin to swell.
Absolutely and you should. The microbes establish on leaf surfaces and help protect against fungal diseases like black spot and powdery mildew that blow in on spring rains. Just avoid applying in direct sunlight, which kills the beneficial organisms before they can colonize.
Don’t add sand it creates cement-like soil. Instead:
- Mix 50% compost with 50% existing soil.
- Add gypsum (3–4 lbs per 100 sq ft) to improve clay structure without affecting pH.
- Work in leaf mold and well-rotted manure — organic matter is the only thing that truly transforms clay into crumbly, workable soil over time.
Roses prefer slightly acidic to neutral: 6.0 to 7.0, with 6.5 being optimal. If your soil is too acidic (below 6.0), add lime. If too alkaline (above 7.0), add sulfur. Always test first — amending without testing is guesswork that can create more problems.
It’s traditional, but recent research questions the practice. While phosphorus is essential for root development, excess phosphate can actually harm mycorrhizal fungi and limit the uptake of other nutrients like iron and zinc.
Get a soil test first. If phosphorus is low, use bone meal sparingly (½ to 1 cup per bush). If your soil tests are adequate or high in phosphorus, skip it and focus on organic matter instead.
Yes — use worm castings (vermicompost) instead. They’re extremely nutrient-rich and brew excellent tea. Mix 1 cup of worm castings per 5 gallons of water, add optional ingredients like kelp or alfalfa for micronutrients, and bubble for 24 hours.
Yes — rake back winter mulch before planting or amending. Never mix old mulch into planting holes, as it can cause nitrogen immobilization during decomposition. Once your compost tea has soaked in and you’ve added fresh compost, apply 2–3 inches of new organic mulch (straw, shredded leaves, or pine needles), keeping it an inch away from rose canes to prevent rot.
First, address the immediate outbreak with an appropriate treatment (organic fungicide if needed), then follow up within a few days with compost tea. The tea adds beneficial microbes that help restore balance after the disease stress. Think of it as probiotics for your garden — restore the good biology after using the “antibiotics.”