
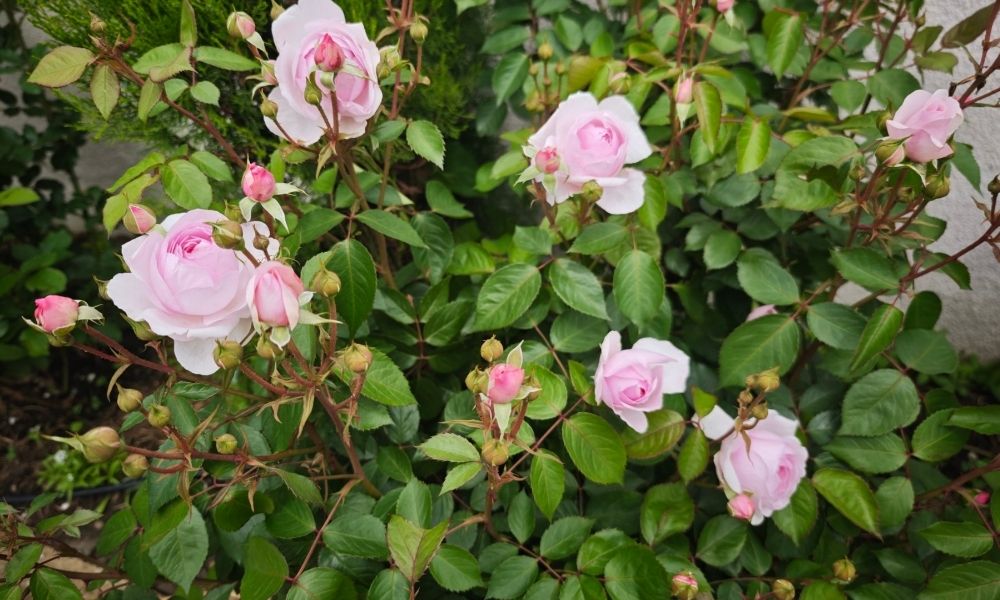
The blooming season is in full swing, and this is the month when your decisions determine whether your garden will keep delighting you until the first frost.
June is a critical turning point. Spring feeding and preventative treatments have already done their job: the bushes are blooming profusely, and the foliage is thick and vibrant green. However, it is right now that the second, summer flush is established, new cane wood matures, and rising temperatures and humidity invite pests and diseases. Neglect your roses in June, and August will leave you with naked sticks instead of blossoms.
1. Deadheading: Prolonging the Bloom
Why it matters:
Roses expend a massive amount of energy producing hips (seed pods). By removing them, you signal the plant to redirect its energy toward producing new flowering shoots.
How to do it right:
Find the first true, fully formed leaf with five leaflets on the spent stem (ignore any three-leaflet leaves higher up). Measure about 5–7 mm below it and make a 45° angle cut just above an outward-facing bud. It is from this exact bud that your next flowering flush will grow.

Deadheading by rose type:
- Hybrid Teas and Floribundas: Deadhead regularly as soon as the flowers fade. This stimulates fresh waves of blooms every 5 to 6 weeks.
- Shrub and English Roses: Light deadheading is best. Simply snip off the spent flower clusters without altering the bush’s overall shape.
- Climbers: After the initial flush, shorten the spent lateral (side) shoots by one-third to encourage secondary branching.
Garden tips
Keep your pruners and gloves handy whenever you visit the garden. Spot a faded bloom? Take 10 seconds to snip it right then and there. Regular, light touch-ups during daily strolls are far better for the plant than a massive, aggressive shearing once a week.
2. Pinching and Thinning: Natural Disease Prevention
By June, rose bushes have fully leafed out, often creating a dark, humid microclimate inside the canopy—the absolute perfect breeding ground for fungal diseases. I always thin out the center of my bushes to keep air circulating freely between the stems. This is one of the most effective preventative measures you can take, and it requires zero chemicals—just smart plant architecture.
What to remove:
- Suckers / Weak side-shoots: Thin shoots growing from the leaf axils of main stems. They won’t produce quality blooms, but will heavily congest the bush.
- Blind shoots: Thick stems that fail to form a flower bud at the tip, producing nothing but foliage.
- Crossing and rubbing branches: When two branches rub against each other, they create open wounds that invite infections.
- Weak basal breaks: New shoots growing into the center of the bush that are thinner than a pencil. They will never grow into strong, productive canes.
Technique:
Make your cuts completely flush with the main stem. Never leave “stubs,” as they quickly rot and become entry points for pathogens.
My Method:
I strip all the lower leaves off my roses, leaving about 20 cm (8 inches) above the ground. This significantly improves airflow around the base and reduces the risk of fungal spores splashing onto the foliage from the soil during heavy rain. Thinning out the center is non-negotiable—roses need to breathe.
3. Watering: The “Deep and Infrequent” Rule
In Zones 6–8, June weather can be unpredictable, bringing either torrential downpours or sudden dry spells. Both extremes pose a challenge.
Managing dry spells:
Right now, roses are actively developing their second flush and expanding their root systems. Shallow watering (like holding a hose over them for 5 minutes) encourages weak, opportunistic roots right at the surface, which dry out instantly and offer zero stability. I use drip irrigation in my garden, and it is an absolute lifesaver. I highly recommend installing a drip system to any serious gardener.
The proper watering routine:
- Volume: 10 – 20 liters (2.5 to 5 gallons) per mature bush per watering.
- Frequency: Once every 5–7 days in the absence of rain.
- Method: Apply water slowly around the base of the plant, keeping the foliage completely dry. Use a soaking hose, a nozzle with a bubbler setting, or buried perforated pipes.
- Timing: Early morning (before 9:00 AM) or evening (after 6:00 PM). Watering during peak midday heat can cause leaf scorch.
My Method:
Always check the soil moisture at a depth of 10 cm (4 inches). The top layer might look dry, but the root zone underneath could easily be waterlogged.
4. Mulching: Beating the Heat
Recommended materials for Zones 6–8:
- Pine Bark (2–5 cm / 1–2 inch nuggets): The gold standard. It slightly acidifies the soil (which roses love), deters slugs, and decomposes slowly.
- Compost: A fantastic alternative if bark isn’t available. Apply a 5 cm (2 inch) layer, keeping it away from the main stems.
- Straw: Avoid this in high-humidity regions (like Zone 6 in the Eastern US). It traps too much moisture, inviting rot.
- Lawn Clippings: This is my personal favorite. I always recycle my fresh grass clippings straight into the flower beds.
Application technique:
Clear all weeds within a 30–40 cm (12–16 inch) radius around the base. Apply a 5–7 cm (2–3 inch) layer of mulch, leaving a 5 cm (2 inch) “breathing space” or collar around the main trunk. Mulch packed directly against the stem will trigger crown rot.
The June mulch bonus:
It smothers weeds just as their second wave of seeds begins to sprout, and it lowers soil temperatures by 3–5°C, preventing the rose roots from overheating.
My Approach:
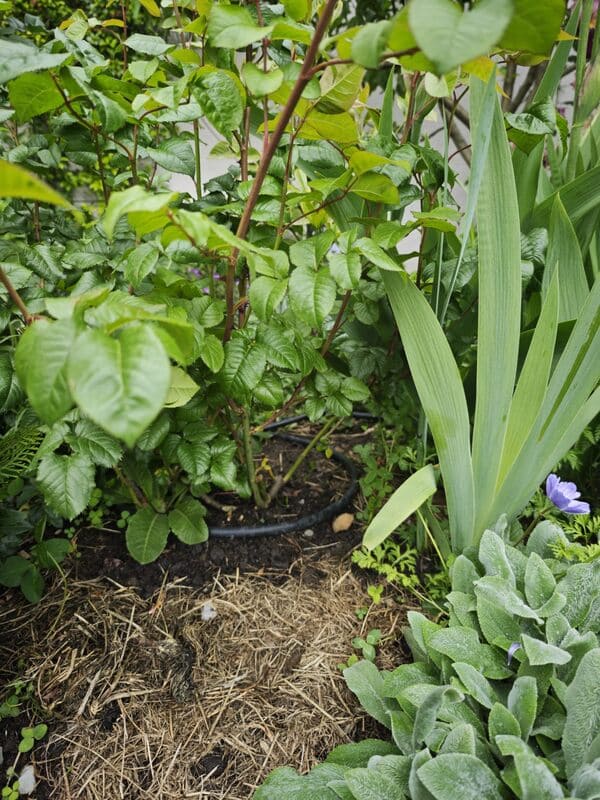
I regularly top off the beds with fresh lawn clippings. They break down quickly, infusing the soil with nitrogen and keeping the mulch layer fresh. The trick is to apply them in thin layers (2–3 cm at a time); otherwise, the green mats down, suffocates the soil, and begins to rot with an unpleasant odor.
5. Feeding: Support, Don’t Overfeed
In June, roses are in transition between bloom cycles. Heavy nitrogen at this stage is dangerous—it triggers a flush of soft, tender growth that is incredibly vulnerable to scorching heat and fungal attacks.
What they need now:
- Potassium: Essential for developing strong flower buds for the next flush, improving drought resistance, and hardening off canes before winter.
- Phosphorus: Supports the root system, which remains highly active throughout June.
- Micronutrients: Especially iron and magnesium (a classic sign of deficiency is interveinal chlorosis —yellowing between the veins of older leaves).
Organic options:
- Nettle Tea (fermented 2 weeks, diluted 1:10): Apply as a root drench every 10 days. It’s naturally rich in potassium and micronutrients.
- Wood Ash Steep (1 cup per bucket of water, steeped for 24 hours): Excellent source of potassium and calcium. Apply every 2 weeks. Exercise caution: always check your soil pH first. If your pH is already above 7.0, skip the ash, as it will raise the pH further. Roses thrive best at a pH of 6.0–6.5.
- Kelp/Seaweed Extract: Boosts root development and overall stress tolerance. Apply per manufacturer’s instructions.
- Chitosan: A fantastic biostimulant that strengthens the plant’s natural immune system. A foliar application in June helps roses cope with extreme heat stress.
What to avoid:
- Fresh Manure: Will trigger sudden outbreaks of phytophthora/root rot.
- High Nitrogen (N) Fertilizers: Results in weak, elongated growth, fungal infections, and fewer blooms.
- Fertilizing Dry Soil: Never apply fertilizer to bone-dry soil without a thorough watering afterward, or you will burn the roots.
My June Ritual:
At the end of the month, right after the heavy blooming winds down, I do a deep root drench using a balanced organo-mineral fertilizer. This replenishes the plant’s energy stores after a demanding bloom cycle and primes it for the next round of buds.
6. Disease Prevention: An Ounce of Prevention is Worth a Pound of Cure
In Zones 6–8, June marks the official start of the fungal disease season. Black Spot (Diplocarpon rosae) and Powdery Mildew thrive in temperatures between 18–24°C (64–75°F) combined with high humidity.
Preventative checklist:
- Weekly inspections: Check the lowest leaves closely, this is where Black Spots always start. Look for yellowing leaves with distinct black spots.
- Immediate removal: Strip away infected leaves immediately and throw them in the trash. Never compost diseased foliage.
- Open up the canopy: After deadheading, make sure air can flow right through the bush. If you can’t see light shining through the center, it’s too dense.
My go-to organic biologicals:
I apply a comprehensive bio-cocktail spray every 10–14 days. Product names vary by country, so look for these key active microorganisms on the labels:
- Bacillus subtilis: Suppresses pathogenic fungi and builds a protective microbiome on the leaf surface. Highly effective against Black Spot and Powdery Mildew.
- Trichoderma spp.: A soil-dwelling antagonist that parasitizes harmful fungi. It can be applied as both a soil drench and a foliar spray.
- Beauveria bassiana: An entomopathogenic fungus that targets pests, creating an ongoing defensive barrier when used preventatively.
- Seaweed Extract: Actively stimulates plant immunity and stress resilience.Important Application Rule: Always spray on a calm evening or on a completely overcast day. Water droplets on leaves under a blazing sun act like magnifying glasses, causing severe burns. Furthermore, biological products are highly sensitive to UV light, which rapidly degrades their effectiveness. Ensure there is a window of at least 8 hours of dry weather ahead before rain.
How it looks in my garden:
I mix Biokatena (which contains Trichoderma) + Boverin + Nauta (seaweed extract). Their compatibility is field-tested; they complement each other perfectly to provide multi-level protection. Always mix your concentrated solutions separately in water before combining them in a single sprayer tank.
7. Pests: Scouting and Early Intervention
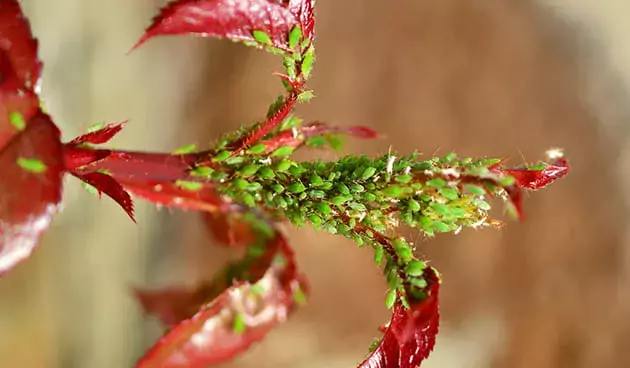
Aphids
Activity peaks in June, with massive colonies clustering on succulent new growth and young buds.
- Symptoms: Curled, sticky leaves (honeydew) and ants crawling up the canes (they “farm” aphids for their sweet secretions).
- Mechanical control: Blast them off from the bottom up with a sharp stream of water from the garden hose.
- Organic treatments: Use a biological avermectin-based spray (like Fitoverm Extra) at 1 ml per liter of water at the first sign of a colony. It works on contact it won’t kill them instantly, but it paralyzes them within 2–3 days.
- Biologicals: Beauveria bassiana targeted sprays effectively control aphids while remaining safe for beneficial predatory insects.
Rose Slug / Sawfly Larvae
These small green larvae skeletonize leaves, leaving behind translucent “windowpane” holes.
- Symptoms: Tiny bead-like eggs laid along the leaf margins by adult females.
- Manual control: Daily inspections of the undersides of leaves. Hand-picking larvae is incredibly effective for minor infestations.
- Biological treatments: For widespread outbreaks, spray Bacillus thuringiensis (BT-based products like Bitoxibacillin or Lepidocide). The larvae will stop feeding and die within 3–5 days of consuming the treated leaves.
Two-Spotted Spider Mites
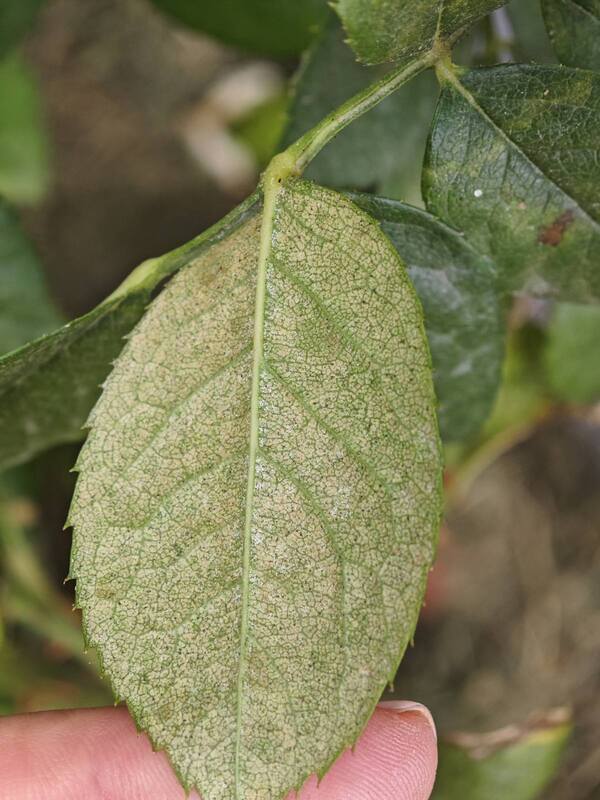
Microscopic but incredibly destructive, especially in hot, dry weather.
- Symptoms: Fine yellow stippling/speckling on the upper leaf surfaces and delicate webbing visible on the undersides of leaves between the veins.
- Prevention: Periodically hose down the undersides of the foliage with water (spider mites despise humidity).
- Treatment: Upon detection, use an organic miticide like Fitoverm (2 ml/L) or Aktofit. Apply 3 consecutive treatments spaced exactly 7 days apart, paying strict attention to coating the undersides of the leaves.
Rose Midge
A tiny midge fly whose larvae feed inside the tips of developing shoots.
- Symptoms: Emerging buds wither, turn black, and die before opening; tips of canes look scorched or bent.
- Primary control: Prune out and immediately destroy the blackened shoot tips.
- Soil treatment: Drench the soil beneath the bush with beneficial nematodes (Steinernema feltiae) to parasitize the pupae overwintering or dropping into the soil.
- Traps: Hang yellow sticky cards at canopy height to capture the adult flies.
8. Biological Focus: When Spot-Treatments Are Needed
In my garden, an upgraded avermectin-based biological insecticide/miticide (like Fitoverm Extra) is my absolute weapon of choice during pest spikes. It is derived from the natural soil actinomycete Streptomyces avermitilis.
How it works:
The active ingredient, abamectin (or avermectin C), paralyzes the nervous system of insects and mites on contact. It blocks nerve impulses, causing the pests to immediately lose the ability to feed and die within 2–7 days. It functions via both contact and ingestion.
Preparing the spray solution:
- For liquid emulsifiable concentrates (typically 1%): Mix 1 ml per 1 liter of water.
- For powders/granules: Follow packaging instructions (typically 1 g per liter).
- Agitate thoroughly until the mixture forms a uniform, milky-white emulsion.
Proper application:
- Spray exclusively in the evening during calm, windless weather.
- Thoroughly coat both sides of the leaves, canes, and buds.
- Maintain a 7–10 day interval between applications, limiting use to a maximum of 3 treatments per season.
- Always mix a fresh batch; the solution is highly unstable and breaks down rapidly in sunlight.
Crucial Nuances: Avermectins are photolabile, meaning they degrade in sunlight within 4–8 hours. Evening spraying gives the product ample time to work and penetrate the plant tissues before morning sunrise.
Safety: It is toxic to bees. Avoid spraying open blooms if local hives are actively foraging. To protect pollinators, I always spray after 5:00 PM when bee activity in the garden has ceased for the day. While it has very low toxicity to humans and mammals, you should still wear gloves and a basic respirator when applying it.
Turn This Season's Notes Into Next Season's Confidence
If your roses keep dropping buds, pushing soft sappy growth, or flowering below their potential, the fix usually isn’t another product on the shelf. It’s understanding what the plant is actually telling you about nutrition, timing, and growing conditions. That’s exactly why I wrote Why Doesn’t My Rose Grow and Bloom? – 100 Reasons and Solutions. It walks you through reading your bush like a rosarian reads the weather—so you stop guessing at treatments and start fixing causes.
The fastest way to build that skill? Keep records. When you log what you applied, when you sprayed, and what the weather was doing, patterns surface fast. Weak second flush after a nitrogen-heavy June? You’ll see it. Black spot always starts on the same three bushes after humid weeks? You’ll spot the link. I built the Rose Garden Planner 2026 – Log Book for exactly this—so each season teaches you something instead of wiping the slate clean every spring.
And if you want fewer mystery problems to diagnose in the first place, start below ground. Healthy soil with active microbial life and simple organic inputs prevents more headaches than any spray schedule. Revolution in the Rose Garden – Organic Rose Gardening pulls those principles into a practical system that works in real backyards, not just paper.
Rose gardening books


Step into a calmer, more confident rose season. With Ann Devis’s rose gardening books and planner, you’ll get simple organic routines, proven tips, and checklists that keep your roses thriving – from first bud to last bloom.

9. Training and Supporting Climbing Roses
June brings explosive cane growth for climbers and ramblers. Left unsupported, these heavy new shoots easily snap under the weight of summer storms and heavy blooms.
Principles of training:
- Keep it horizontal: Always secure canes horizontally or at a 45° angle. This suppresses apical dominance, forcing lateral buds to break all along the cane, resulting in a wall of flowers rather than blooms only at the very top.
- Tie loosely: Leave a loop of breathing room. Stems thicken rapidly in summer; a tight knot will constrict the bark and choke the cane.
- Tie weekly: Secure new canes while they are still green, supple, and pliable. Older, woody canes will snap if you try to force them into shape later.
- Materials: Use soft, flexible ties made of natural fibers, specialized stretchy garden tie tape, or soft cotton strips. If using plastic zip ties, always use a soft rubber spacer pad underneath to prevent bark friction.
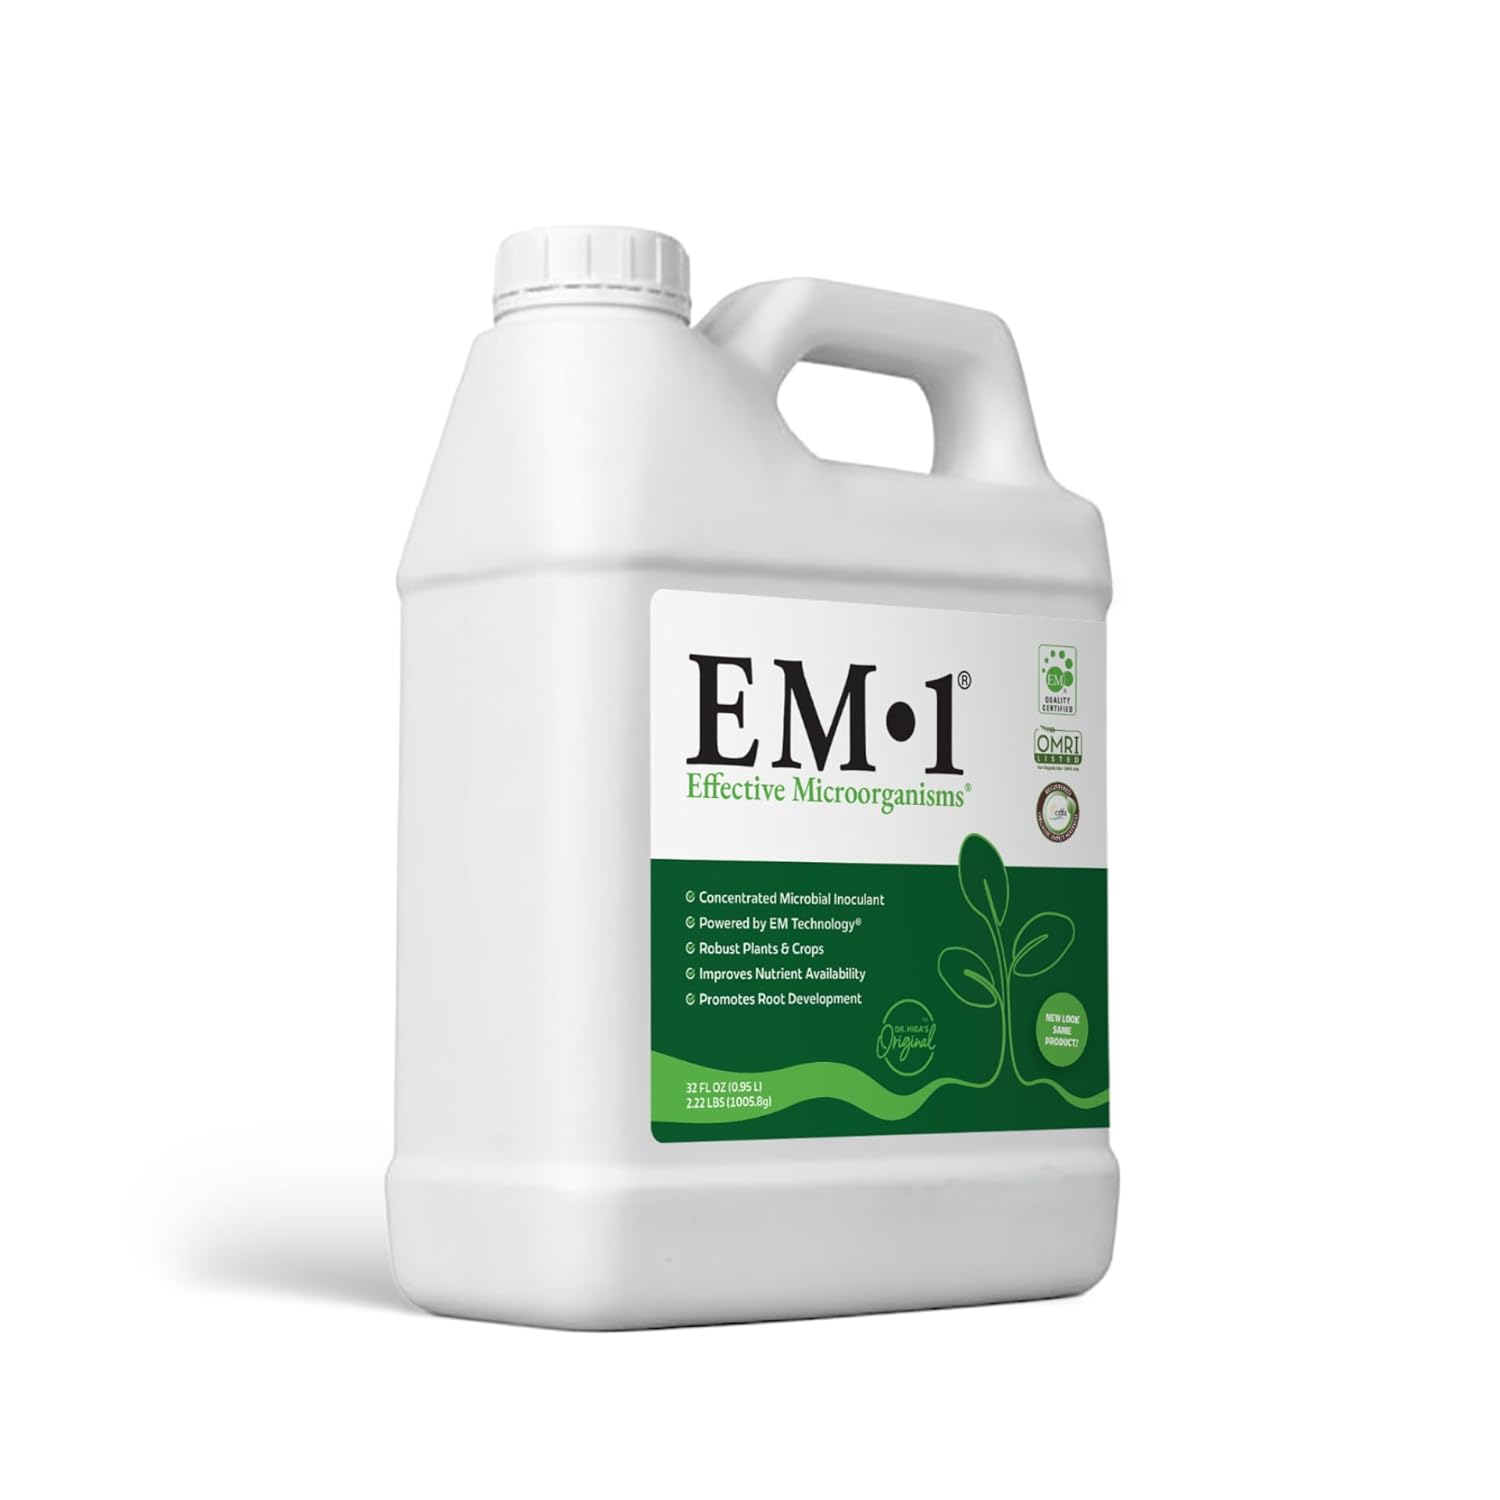
10. EM (Effective Microorganisms): Soil Health Drenches
Once a month, I give my garden a thorough drench with an EM-consortium (Effective Microorganisms) solution. It’s not a fertilizer in the traditional sense; rather, it’s a live microbial cocktail of beneficial bacteria and yeasts that completely revitalizes the soil microbiome.
Why it’s essential:
EM preparations dramatically improve soil structure, accelerate the decomposition of organic matter in the root zone, suppress harmful soil-borne pathogens, and convert locked-up nutrients into highly bioavailable forms that rose roots can easily absorb.
My recipe:
- Mix 15–20 ml of EM concentrate into 10 liters (2.5 gallons) of water.
- Slowly drench the root zone, ensuring the solution penetrates to a depth of 15–20 cm (6–8 inches).
- Best timing: Apply in the evening immediately following a regular watering session or a good rain, as microbes thrive best in pre-moistened soil.
11. Priming the Second Wave: Stimulating Summer Blooms
Once deadheading is complete, you need to send a clear signal to your roses that it is time to cycle back into production.
The stimulation protocol:
- Pruning: Deadhead strictly above an outward-facing 5-leaflet bud as detailed above.
- Watering: Provide a deep drench infused with organic nutrients, such as nettle tea or a wood ash steep.
- Mulch check: Ensure the soil isn’t exposed. Top off the mulch layer if it has thinned out.
- Biostimulants: Apply a foliar mist of chitosan or kelp extract on a calm evening to boost cellular health and root response.
- The feeding pause: Hold off on any heavy granular or chemical fertilizers for 10–14 days post-pruning. Allow the rose to naturally transition back into active growth mode rather than forcing it to store excess salts.
Within 4–6 weeks of executing this routine, you will spot a fresh crop of plump buds. In Zones 6–8, this second flush typically peaks around late July to early August.
June Mistakes: What NOT to Do
- Do not transplant: The combination of summer heat and intense sap flow makes transplanting highly fatal in June. If a rescue move from deep shade is absolutely unavoidable, accept that you will forfeit the entire blooming season.
- Do not hard-prune: Light deadheading is encouraged; major structural pruning is prohibited. Extreme heat prevents large pruning wounds from healing properly.
- Do not overdo nitrogen: Excess nitrogen yields soft, sappy leaves, zero flowers, and invites an onslaught of fungal diseases and aphids.
- Do not spray in peak midday heat: Even completely organic or biological solutions will cause severe chemical foliage burns if applied in direct sunlight or when ambient temperatures exceed 25°C (77°F).
The Ultimate June Rose Care Checklist
Weekly Routine:
Deadhead spent blooms during every garden stroll.
Inspect lower leaves for Black Spot and spider mites. Strip lower foliage up to 20 cm from the ground to maximize base ventilation.
Thin out the center of crowded bushes ensure light and air can pass completely through the canopy.
Check soil moisture depth at 10 cm (4 inches) before watering.
Train and loosely tie new green climbing rose canes.
Every 10–14 Days:
Apply a preventative foliar spray of biologicals (Bacillus subtilis, Trichoderma, Beauveria bassiana, or seaweed extract).
Apply organic root or foliar feeding (fermented nettle tea, cautious wood ash steep, or balanced organo-mineral blends).
Monthly Maintenance:
Inspect mulch layers; top off to maintain a consistent thickness of 5–7 cm.
Apply an EM (Effective Microorganisms) soil drench (15–20 ml per 10L of water) onto pre-moistened soil.
Perform a comprehensive, close-up pest inspection (scouting for aphids, sawfly larvae, and midges).
As Needed:
Hand-pick sawfly larvae or blast aphid clusters off with a sharp stream of water.
Spot-treat severe pest outbreaks with an avermectin-based biological spray (1 ml/L) in the evening.
End of Month:
Perform a deep, thorough root drench supplemented with a high-potassium organo-mineral feeding to help bushes recover from the spring flush.
June is the month a rosarian transitions from “creator” to “guardian.” Your spring dreams have already manifested into beautiful blossoms, but right now is when you lay the groundwork for what your garden will look like in August and September. Invest just two to three hours a week into your bushes now, and they will reward you with a second summer flush that is just as breathtaking – long after your neighbors’ roses have faded.
Which of these June tasks do you find the most challenging, or what questions do you have about your current routine?
FAQ
In June, this is almost always a sign of Black Spot (Diplocarpon rosae), a highly contagious fungal disease triggered by warm temperatures and rising humidity. The fungus causes yellowing leaves with distinct dark spots, which eventually drop off, leaving the canes naked. Immediately strip off infected leaves, throw them in the trash (never compost them), and improve airflow by thinning the center of the bush. Going forward, apply a preventive bio-cocktail (such as Bacillus subtilis or Trichoderma) every 10–14 days.
Many rose varieties temporarily cease or slow down flower production during peak summer heatwaves as a natural survival mechanism known as heat dormancy. When temperatures consistently rise above 25–30°C, the plant focuses its energy on survival and root maintenance rather than reproduction. Do not try to force blooms by adding heavy fertilizers at this time — pushing new growth during heat stress makes the plant highly vulnerable. Instead, maintain deep watering, ensure a thick layer of mulch to keep roots cool, and wait for temperatures to moderate; your roses will naturally bounce back with a fresh flush.
For repeat-blooming roses (like Hybrid Teas and Floribundas), you should cut the spent stem down to the first true, fully formed leaf that has five leaflets (ignore the three-leaflet leaves closer to the old flower). Make your cut about 5–7 mm above an outward-facing bud at a 45-degree angle. For Shrub and English roses, a lighter touch is better; simply snip off the faded flower cluster to preserve the bush’s natural architecture.
No, avoid transplanting roses in June if possible. Because sap flow is at its peak and summer heat is setting in, transplanting can cause severe root shock that can kill the plant. The absolute best time to move a rose is during its dormant winter period (late fall to early spring). The only exception is an emergency rescue move (e.g., a bush completely suffocated by sudden deep shade), but even then, you must prune the foliage back significantly and accept that you will entirely lose that year’s blooming season.
Ditch the habit of light daily watering. Roses thrive on a “deep and infrequent” routine. During dry summer spells, water deeply once every 5 to 7 days, delivering 10–20 liters (2.5 to 5 gallons) of water per mature bush. This encourages the roots to grow deep into the soil, where it stays cool and moist, making the plant drought-tolerant. Light, daily surface watering leads to weak, shallow roots that dry out instantly in hot weather.
A blind shoot is a cane that looks perfectly thick and healthy but fails to form a flower bud at its tip, producing only lush green foliage. It is usually caused by weather fluctuations, minor pest damage to the growing tip, or lack of light. During your June thinning, prune these blind shoots back by half to an outward-facing bud, or cut them flush if the center of the bush is already too crowded. This redirects nutrients to productive, bud-bearing stems.
If the edges of the petals turn brown and glue together, preventing the bud from opening, it is a weather-related condition called flower balling, common during cool, wet Junes. However, if the entire tip of the new shoot is turning black, wilting, and curving downward like a shepherd’s crook, you are likely dealing with Rose Midge or a severe infestation of Aphids. Immediately clip off and destroy the damaged tips, and check the undersides of nearby leaves for pests.


